“My atomizer X is dry/gurgling/has flooded my bag!” “Help!”… Probably the first message we all sent the first time we tried rebuilding. And as always, asking three different people will get you six different opinions, all contradicting each other: “This atomizer should be wicked like this.” “No, it should be wicked like this!” “You all know nothing! You’re all wrong! Saint Christopher appeared in my dreams and enlightened me: this is how it should be wicked!”

Alright, let’s try to provide a global solution by increasing our understanding of the system rather than relying on specific and debatable solutions. If you’ve ever had issues with your RTA not properly feeding the coil, it’s probably due to a fundamental factor many overlook: air compensation in the tank.

Wicking an RDA is straightforward, but an RTA is a different story

n RDAs, wicking is quite simple: you insert the cotton into the coil, cut it to the right length, and place it in the juice well. There are no structural limitations affecting liquid feeding, as the cotton just needs to be in contact with the soaked bottom.

In RTAs, however, the dynamics change completely. Each tank has its own structure, with wider or narrower juice flow channels and different vaporization chambers. A mistake in wicking can lead to two main problems:

  1. Flooding (excess liquid on the coil and gurgling)
  2. Dry hits (cotton not feeding properly, leading to burning and unpleasant taste)

The principle of capillarity: more cotton, more efficiency?

We have widely discussed and confirmed how a compact wick results in faster capillarity: well-packed cotton absorbs and transfers liquid to the coil more efficiently. However, this factor alone is not enough.

Excess cotton in the juice flow channels can actually hinder air rising back into the tank. If liquid is flowing down but air cannot rise, a partial vacuum forms, reducing pressure and preventing a steady liquid flow to the coil. This effect is particularly noticeable in bottom-feeding RTAs, where air compensation capacity is limited.

The solution: wick smartly

To ensure optimal feeding, you need to find the right balance:

  • Ensure the cotton is well inserted into the juice flow channels but without completely blocking the passage.
  • Always leave some space to allow air to rise back into the tank.
  • If your RTA has very large channels, consider thinning the cotton slightly with tweezers to prevent total obstruction.
  • Try different wicking lengths and observe how the liquid behaves: a good wick allows consistent feeding without flooding or dryness.

Conclusion

If your RTA isn’t wicking properly, it may not just be a capillarity issue but rather a balance between liquid and air. Make sure to wick in a way that allows proper airflow, and you might solve many feeding issues you didn’t even realize you had. Next time you rebuild your RTA, try applying this advice: you’ll notice the difference!


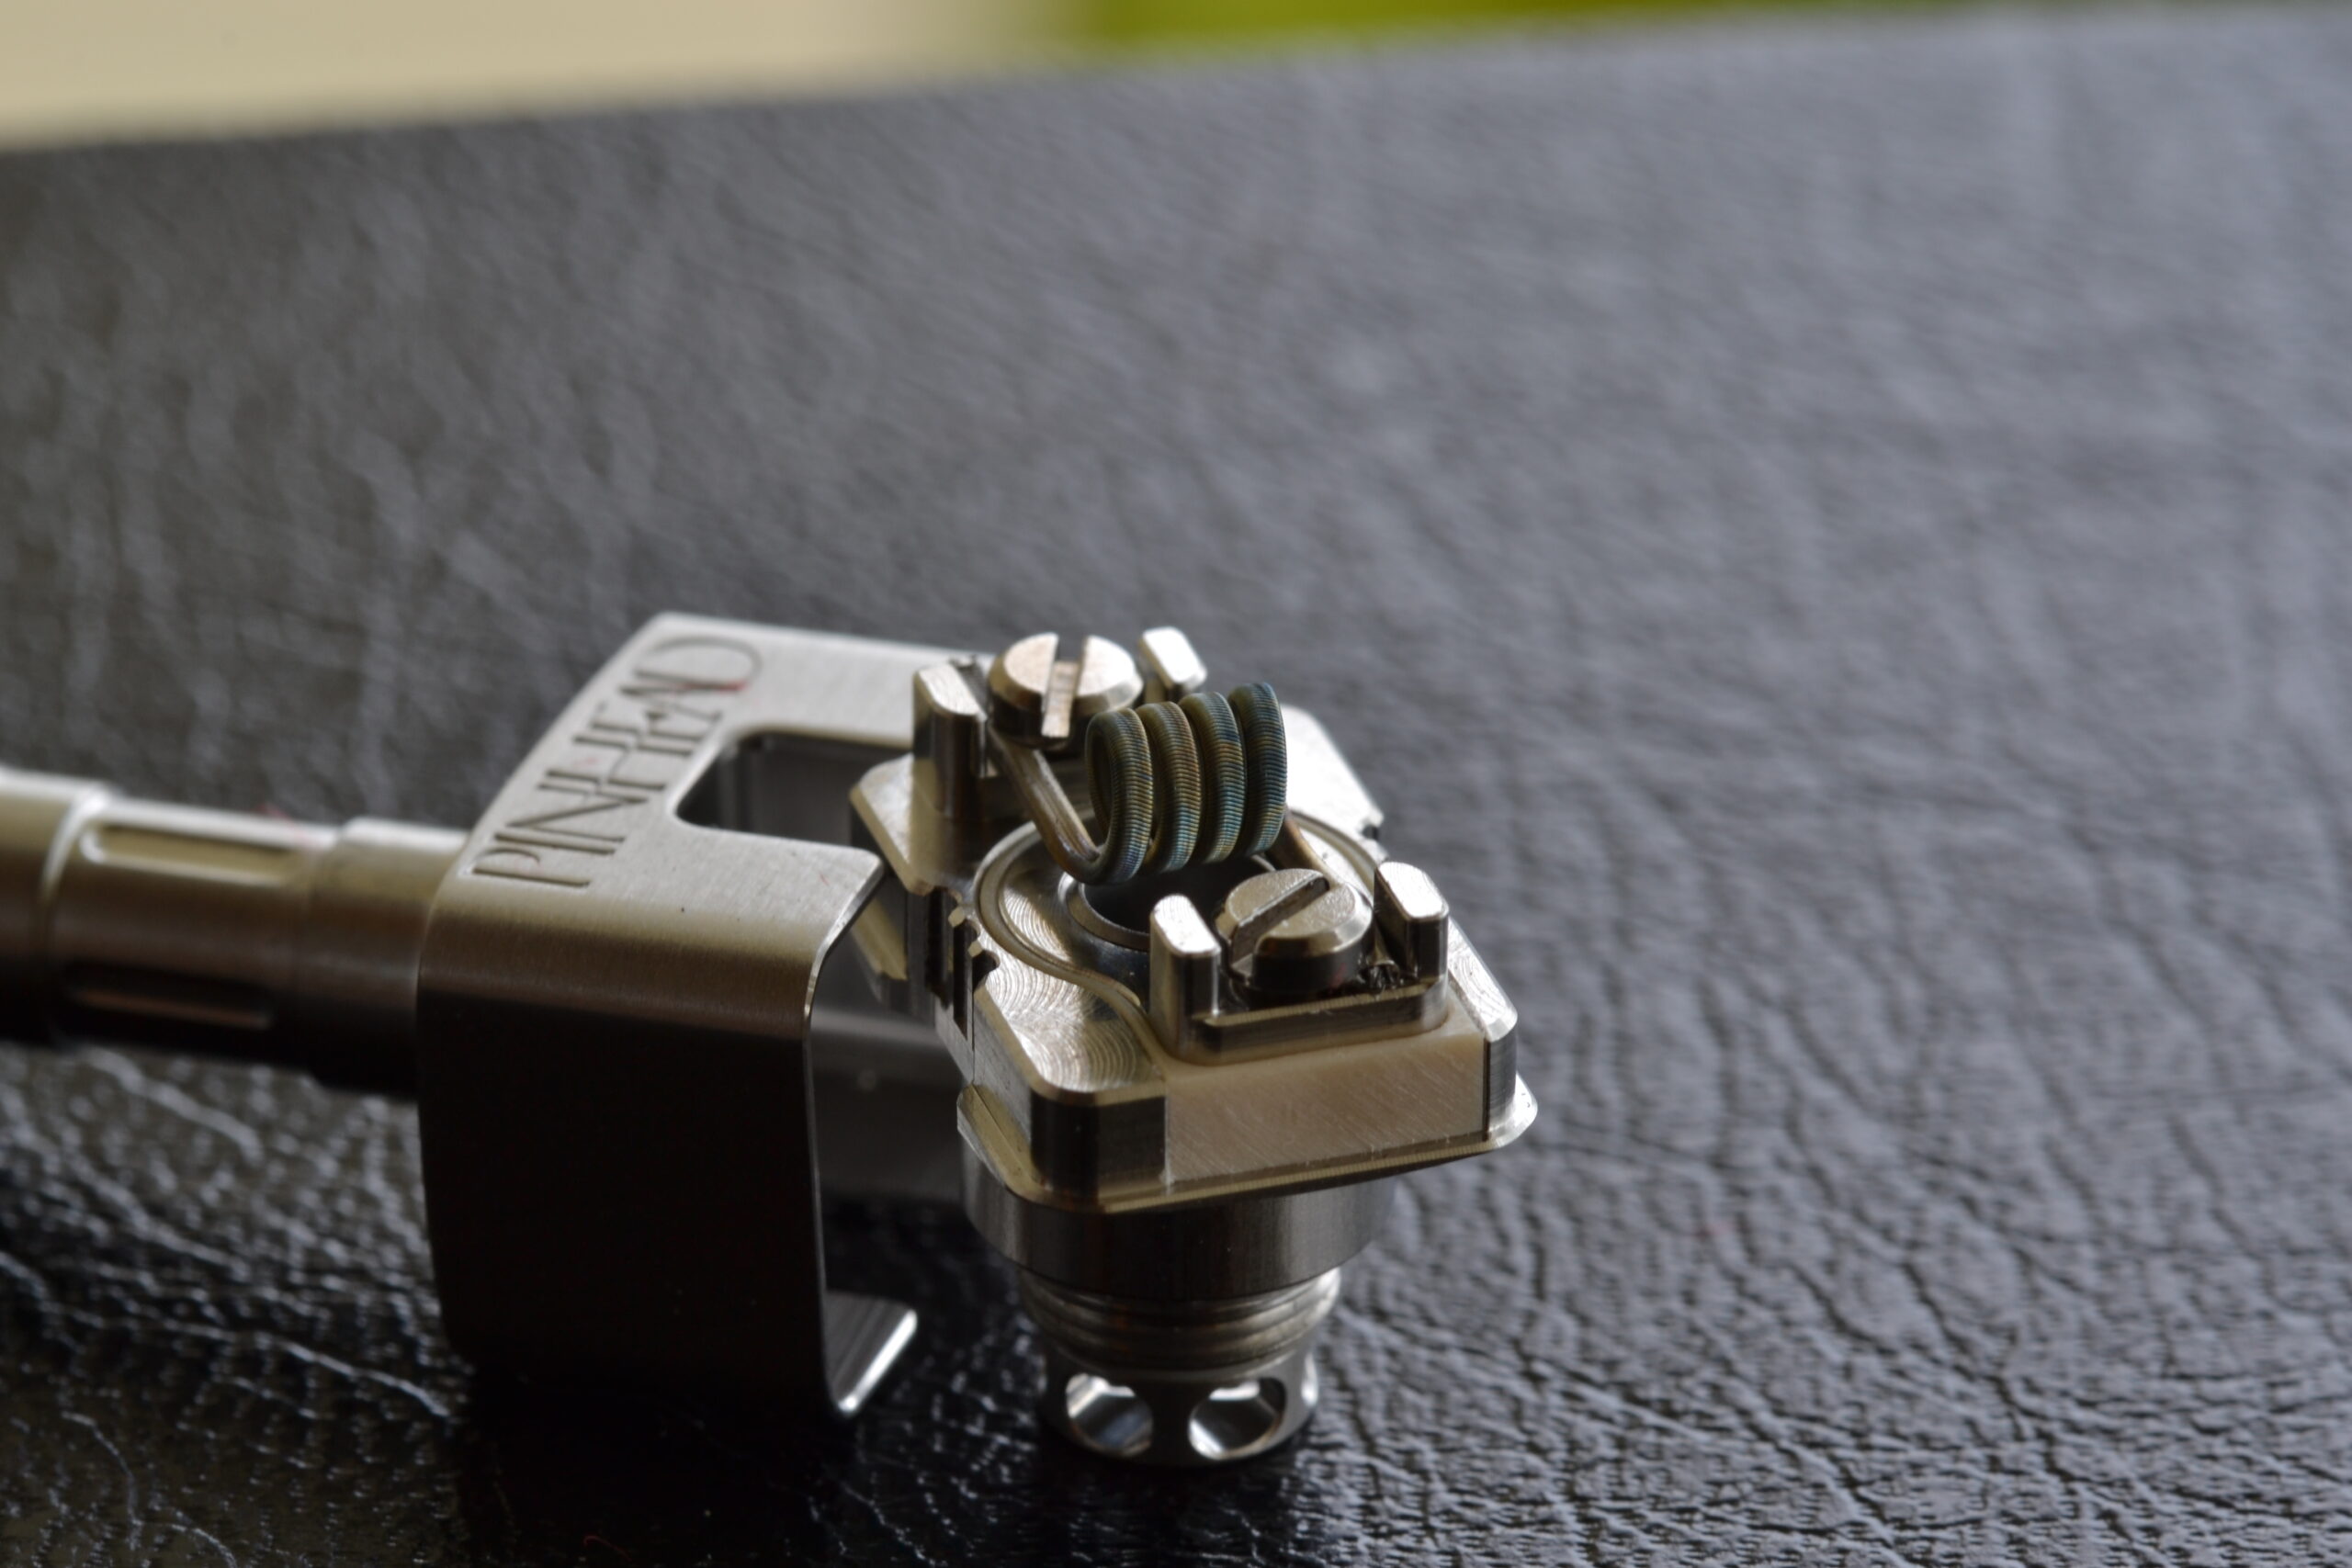
Hotspots are a phenomenon that typically occurs during coil assembly and manifests as irregular ignition, localized in small points instead of a uniform activation across the coil. Typically, on a newly installed coil, you can see spots that light up before the rest of the coil. The ohm value is also affected: because the current takes a shorter path through the resistance, the coil’s reading is much lower than expected.

An excessively low ohm value compared to expected values is always a symptom of a hotspot!

This is an almost inevitable phenomenon linked to the coil’s wrap, that is, the outer winding. It involves the creation of “alternative paths” for the current through the outer wrap instead of the inner core. It is often confused with the coil’s quality, and many myths have arisen around this phenomenon, attributed to things like wire stress (but what does that mean?) or poorly constructed coils.

The truth is that it is much more related to the coil’s complexity and the diameter of the wires used. Simply put, a finer or more complex wrap will make more windings around the core. Consequently, there will be more contact points that can create undesired paths. Similarly, more complex wraps like interlock or stitched wraps double the likelihood of hotspot formation.

Naturally, the number of wraps also matters: a big-ass coil uses twice the material compared to a “normal” coil and consequently has twice the chances of forming hotspots.

Finally, the “softness” of a coil: the more complex a coil is, the thinner the wire diameters will be, making the coil less rigid. A softer coil is more likely to come apart during assembly.

In other words, the more premium a coil is, the more experience a vaper will need to remove hotspots! Let’s look at the best solutions:

When performing the first activations or a dry burn, it’s wise to drastically reduce the wattage. Applying too much power to a hotspot could permanently weld it, making future removal impossible.

People often tend to scrape the surface to remove hotspots. While effective, this method is risky, especially on expensive coils with intricate wraps like staggerton, interlock, stitched, etc. The safest solution is to slightly separate the wraps where the hotspots form.

Prevention is better than cure! When mounting a coil on the atomizer, it’s wise to slightly separate the coil’s legs from the windings with a gentle push using a screwdriver tip. This will remove the first unwanted contact point and make hotspot removal easier.

When inserting the cotton, the coil might generate new hotspots. An ohm value reading will promptly reveal them. Fortunately, if you’ve done a good job removing them initially, they will be easy to fix—just push the wraps outward to restore the correct path.

When you remove the cotton to perform a dry burn, the coil may come apart, requiring you to remove some new hotspots. Reducing the wattage is essential to avoid damage.

A video is worth a thousand words, so here’s a quick tutorial to effectively remove hotspots:

https://youtube.com/watch?v=aYi7FAzb_O0%3Fsi%3D11bYz2hAHpCMhXLs

Success is always tied to the perfect balance of coil, atomizer, and liquid! Each coil has its own specific characteristics, which can be briefly summarized. There is a significant difference between a tight MTL with natural organic extracts and an airy mouth-to-lung vaping with creamy or fruity flavors!

The main rule remains: simpler coils for simpler liquids, more complex coils for liquids rich in nuances. Even though a limited edition coil will always have an extra edge, these advantages might be minimal with less complex liquids and wouldn’t justify the cost. It’s better to go for less elaborate variants! Conversely, if you’re looking for a specific performance (e.g., very dry for tobaccos or very distinct for fruits in RDL), choosing a compromise might not give you the result you’re looking for.

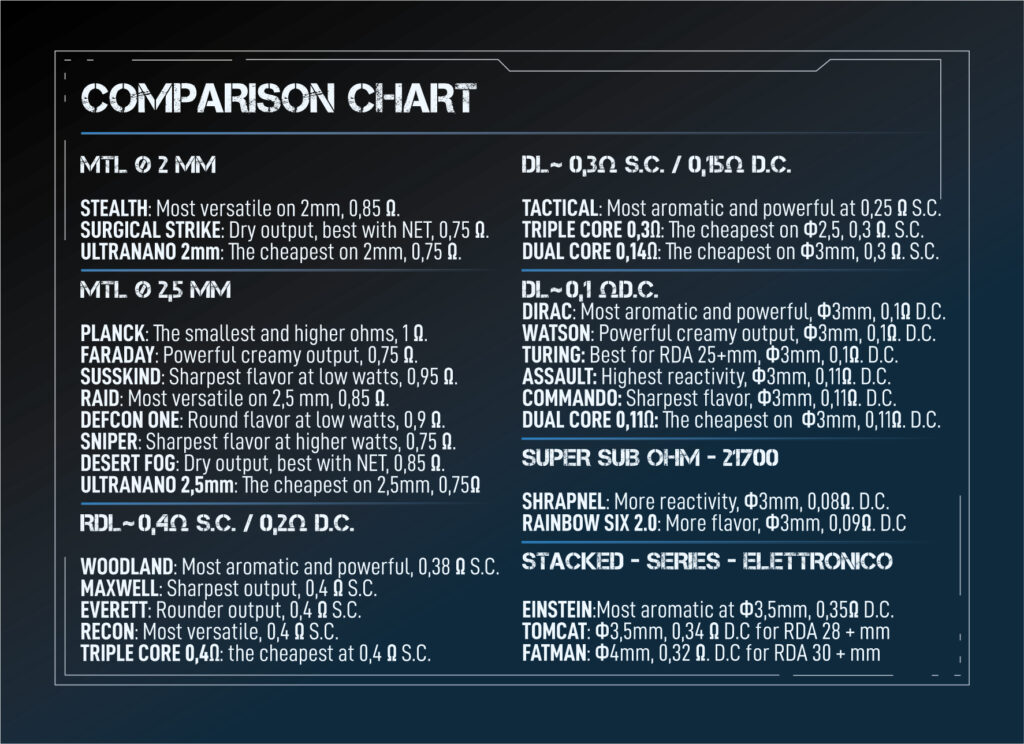
This chart summarizes in a few words why to choose one variant over another, but for a complete overview, we always recommend browsing the catalog with the full coil descriptions.

You can download it from the link below:

https://shop.breakill.com/wp-content/uploads/2024/09/CAT_24_ENG_WEB.pdf